A Guide to Networking in DOS
In 1990 I had no intention or means to connect to anything over a network. In the US it was far more commonplace to connect your home computer to BBSs and other networks via a modem, but here in the UK it just wasn't something we did much of, leaving the concept of networking to the corporate and educational establishments. It wasn't really until the mid-90s that modems entered the home en-masse.
Why Network?
So what are the benefits of getting your retro PC onto a computer network? The two key benefits are:
- To get files onto your retro PC
- Connecting to the Internet
If you want to play retro multiplayer games, most of these use short serial cable connections between just 2 computers and don't require any more hardware than the "null modem" cable itself. As such I won't be covering that in this article. Some games did support modem play for gaming with friends not in the same building as you. All computers to be connected needed a modem and be connected to their analogue telephone line.
Does DOS Even Have Networking Capability?
The short answer to this question is, no. Out of the box, none of the flavours of DOS from Microsoft, IBM, or Digital Research supported connectivity to a network. From the early 80s there were third-party programs such as LapLink and Norton Commander to allow you to use your serial or parallel port to transfer files from one PC to another via a cable, and DOS versions 6.0 and up got two utilities, INTERLNK and INTERSVR, that did the same thing. This became a much bigger deal when laptop computers became more commonplace, and it was even pretty common to have infra-red transmitters/receivers (see "IrDA") built-in for the purpose of file transfer.
Some games were also programmed to support direct cable connection of up to 8 PCs, also via the serial or parallel ports. These used one of two networking communications protocols to handshake with other PCs: TCP/IP and IPX/SPX by Novell. You will no doubt be familiar with the former, as it's the most widely used protocol in the world.
A Brief History of DOS Networking
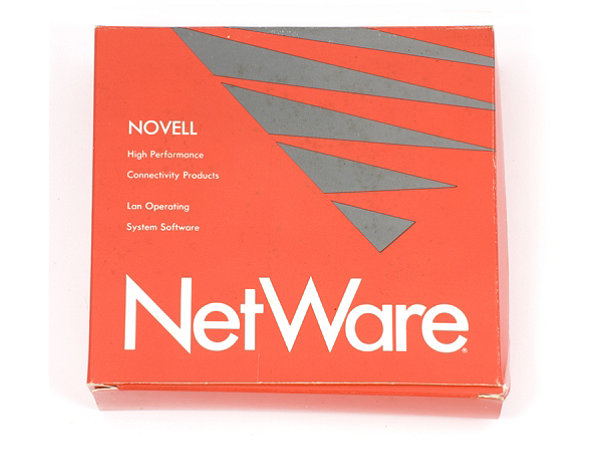
In 1983, 2 years after the launch of the IBM PC, a computer hardware company called Novell launched a product called NetWare 86 (for 'x86'), designed for the IBM PC/XT and compatibles.
This came with tools that you could run to turn your collection of PCs into one server, and one or more clients. All PCs running Novell's client TSR could log in to the PC running the NetWare Server software. The machine designated as the server controlled access to devices on the network such as printers and shared hard disks.
NetWare worked on the basis of defining a volume (much like a DOS volume), and then clients would map a DOS drive letter to that NetWare volume. In order to map a volume successfully a client would first have to login to the server. Clients could also have direct access to any printers that were connected to the server just as if they were connected to the client's own parallel port.
A better, faster version designed for the IBM PC/AT was released in late 1985. This leveraged the larger amount of RAM the 286 could access as well as its 16-bit Protected mode.
Microsoft MS-Net and LAN Manager
Around a similar period, Microsoft released a product called MS-Net, to coincide with the launch of its new PC/AT. Rather than being an out-of-the-box networking solution, it was more a framework they sold to vendors who would then use it to build their own network programs. It was based on IBM's NetBIOS protocol.
In 1987 MS-Net was superceded by Microsoft LAN Manager - a program jointly developed by 3Com and Microsoft. Microsoft intended LAN Manager to be for its new OS/2 operating system it was cooperatively developing with IBM. Microsoft's version of LAN Manager continued to use the NetBIOS protocol, whereas 3Com chose to use the XNS (Xerox Network System) protocol.
In 1990, Microsoft released LAN Manager v2.0 which added support for the TCP/IP protocol which is still in widespread use today.
First Some Basics on TCP/IP - the "stack"
You can skip this section if you've studied Computer Science or are simply not intested in what TCP/IP is, and you just want to transfer some files.
Basically TCP/IP is two protocols rolled into one: The "TCP" bit stands for Transmission Control Protocol, and the "IP" bit stands for Internet Protocol. Why a stack? Good question. In laymans terms data to be sent (transmitted) needs to go from a physical card (a network card and cable) to eventually be consumed by a program, an application on another computer. Way back in the dim and distant past, TCP/IP was created as a model based on what was called the OSI Model, or Open Systems Interconnection, whereby a number of conceptual layers exist, one on top of the other - a stack, if you will - each one with a specific task when it comes to handling this data being sent:
Starting from the bottom which is the Physical layer... this is basically the copper wire in your network cable connected to your network card - this takes the data being sent and passes it up to the Data Link layer. It is here that the data is grouped into 'frames' for easier transport in chunks (that's my term, sorry). From here the data is passed up to the Network layer. It's here that the "IP" part of TCP/IP kicks in to form a 'packet' consisting of multiple 'frames' of data, and to determine where the packet's destination is. It then passes the newly formed packet with more information held within it up to the Transport layer which is where the "TCP" part kicks in. It is here that the ordering of packets received at the destination and any error checking is done to ensure the data packets arrive 100% the same as what was sent and in the correct order. The rest of the layers (Session, Presentation and Application) are the receiving Application's responsibility to do with the data as it chooses. TCP/IP merged a number of the OSI model's layers together for simplicity, as you can see on the right side of the illustration above.
So in a nutshell, both "TCP" and "IP" combined provide a robust means of data delivery from source to destination computer over a network with flow control, error checking and resending, etc.
So How Can I Get My DOS-based PC onto a Modern Network?
To bring your retro PC 'online' you really need 3 things:
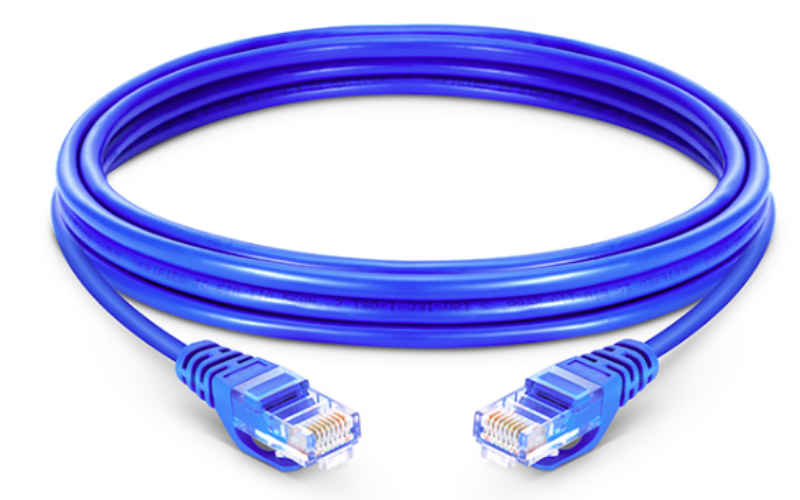
- A NIC (Network Interface Card) and RJ45 network cable (see the top pic in this article).
- A DOS packet driver for the NIC you will be using.
- A DOS TCP/IP stack.
If you are familiar with using a network today from your Windows PC, please bear in mind that once we've got all this up and running it's not like you'll have something like an N: drive on your DOS computer to be able to see files on your Windows 10 box. We are simply creating the network interface to allow networking utilities like an FTP or TELNET client to be able to talk over the connection, but also for your DOS computer to gain access to the World Wide Web!
Now let's look as each of these 3 things in turn:
1) Network interface card
This article assumes you will be connecting to an Ethernet network rather than the outdated and virtually extinct Token Ring network, Star network, or others, so you need to choose an Ethernet network card. It also assumes you will connect the card to your network using an RJ45 cable rather than a BNC connector, which look more like a UK RF socket or a Coax socket:
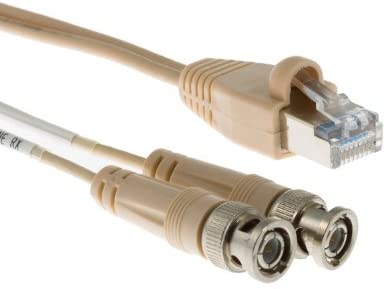
On the left, two BNC connectors, and on
the right, an RJ45 Ethernet connector
Just like graphics cards to be used in a DOS environment, it doesn't really matter if you choose to use an ISA or PCI Ethernet card, as long as you can find the right DOS driver for it.
Most Ethernet cards support a maximum throughput of either 10 Mbps (Megabits per second) or 100 Mbps. These cards are often defined as being 10Base-T or 100Base-T respectively. Today your modern PC uses what is commonly called "Gigabit" ethernet, which is 1000Base-T.
One thing to note is that if you choose an ISA network card, there is a maximum bandwidth the ISA bus can handle which is about 1.5 MB/sec (megabytes per second). Given this bottleneck, it doesn't benefit you choosing a 100Base-T ISA card that's theoretically capable of 12.5 MB/sec transfer speeds, when a 10Base-T card can theoretically transfer 1.25 Megabytes per second. 100Base-T cards are always backwards-compatible with 10Base-T - you just won't be able to realise their maximum performance on the ISA bus. If using a PCI network card, this is where a 100Base-T cards' performance can be fully used.
Some of the more common 10Base-T cards are:
- 3Com EtherLink III 3C509-TX / 3C509-TP (ISA)
- 3Com Fast EtherLink 3C515-TX* (ISA)
- 3Com EtherLink III Parallel Tasking 3C590-TX (ISA)
- D-Link DE220 (ISA)
- Intel EtherExpress 8/16 (ISA)
- Realtek RTL8029 (PCI)
And some of the more common 100Base-T cards are:
- 3Com Fast EtherLink Parallel Tasking 3C595-TX (PCI)
- 3Com Fast EtherLink Parallel Tasking 3C905-TX (PCI)
- D-Link DFE530TX (PCI)
- Intel EtherExpress PRO/100+ (ISA)
- Intel EtherExpress PRO/100S (ISA)
- Intel PRO 1000 GT (PCI)
- Realtek RTL8139S (PCI)
*3Com 3C515 cards will not work due to DOS packet drivers not working with it.
Do note that if you're looking to get an 8088 or 8086 PC on the network you can often use a 16-bit network card in an 8-bit slot and it will auto-detect the slot it is in and run in 8-bit mode, i.e. slower. Lots of Novell NE2000 cards do this (and so run as if they were the shorter and slower NE1000), as do D-Link 220-based cards, the Intel EtherExpress 8/16 and the 3Com EtherLink III 3C509 cards.
2) PACKET Drivers
Packet drivers are responsible for the low-level communication with your card. The best place to pick up a packet driver for your card is usually still the original manufacturer's website.
In my case, I only have one ISA network card:
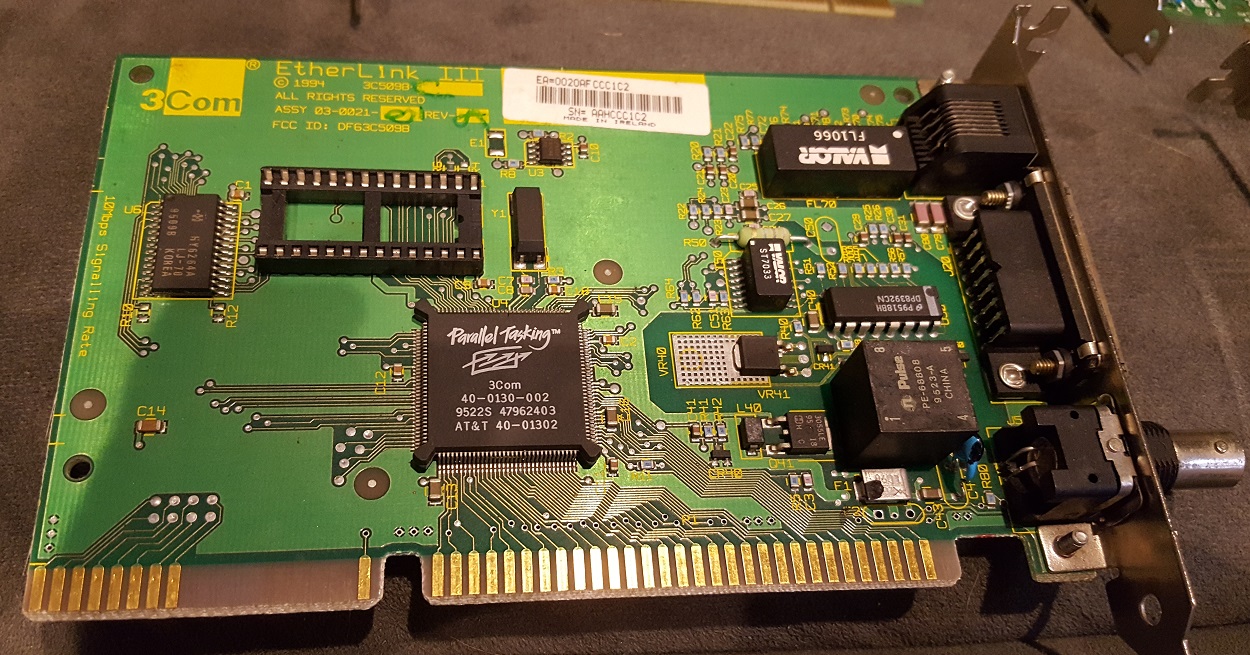
A 3Com EtherLink III, model 3C509B
Despite this card being a 16-bit ISA card its driver readme file confirms that it can be used in an 8-bit slot but does require an 80286 CPU as a minimum. I want to install this in my XT, so the standard drivers won't work for my NEC V20-based system (an 8088 clone). Fortunately, a hacked packet driver and config tool has been created by a user called nestor to allow you to run this card on an XT - the files are available here on GitHub.
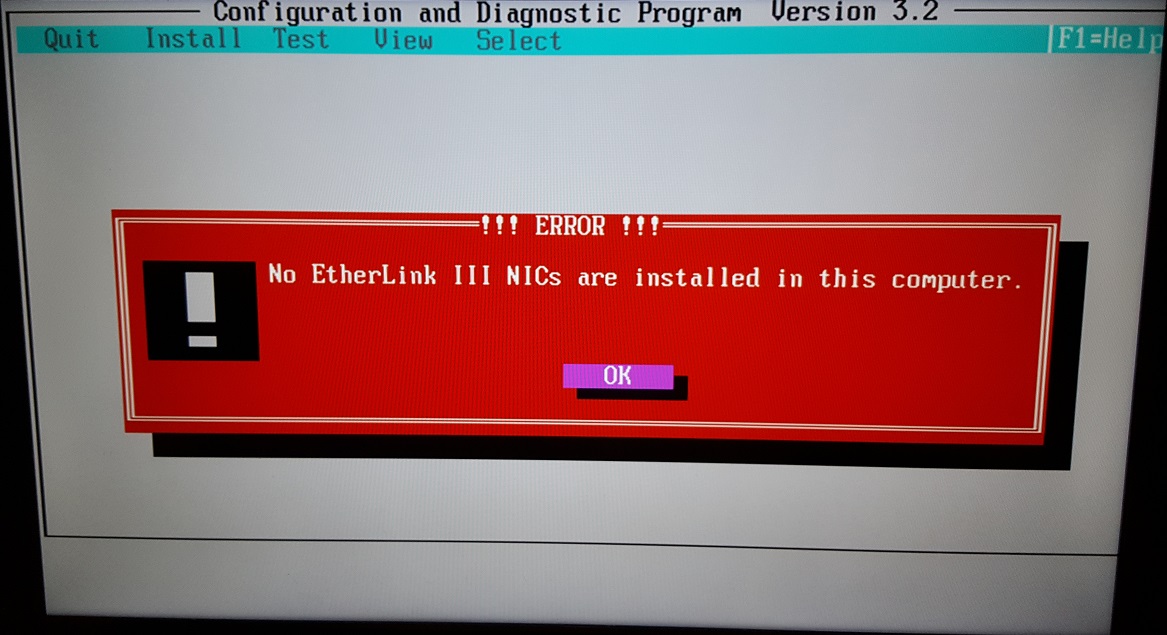
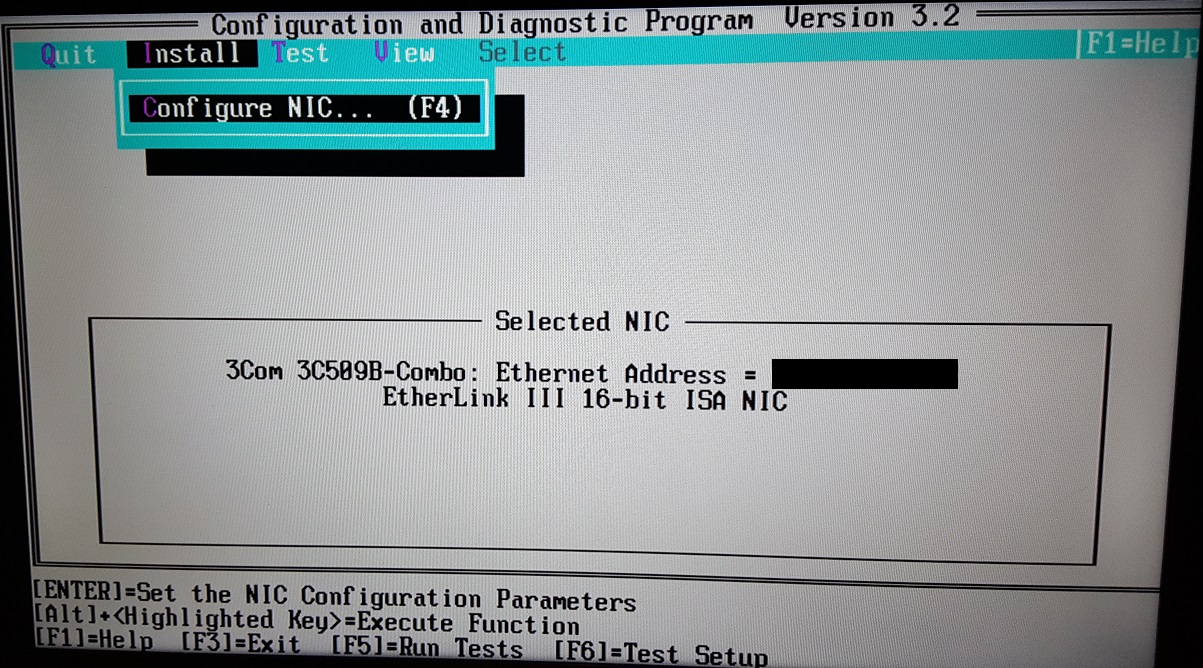
If you were to try to run the stock 3Com config utility (3C5X9CFG.EXE) on an XT, you would get this:
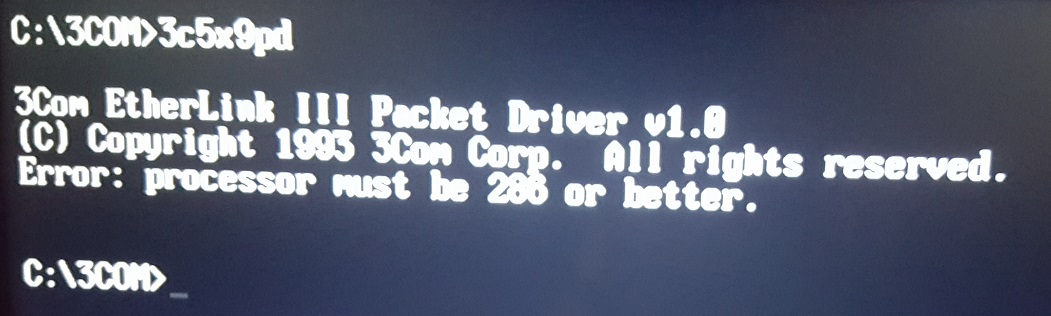
and running the stock 3Com packet driver (3C5X9PD.COM) aborts with this message:
whereas the recompiled version of the config tool from nestor gives this - woohoo!
3) The TCP/IP Stack
I recommend using mTCP by Michael Brutman as a lightweight TCP/IP stack, though there are numerous alternatives out there, so feel free to use whatever you like. In theory any DOS TCP/IP stack should now be able to work.
mTCP has a configuration file which it looks for in your environment variables when you run any of its utilities. It needs an environment variable to tell it where to find that config file, so on the DOS command-line, run something like this:
SET MTCPCFG=<path to your .CFG file>
Obviously changing it to match your directory where you installed mTCP. You will probably want to have this in your AUTOEXEC.BAT file so you don't have to type it every time.
Once you have both the packet driver for your card and mTCP installed onto your DOS computer, first run the packet driver executable file. Typically all these require is a single command-line argument that denotes the interrupt number to use.
In my case I run nestor's 3C509.com executable and tell it to use the default interrupt of 60h:
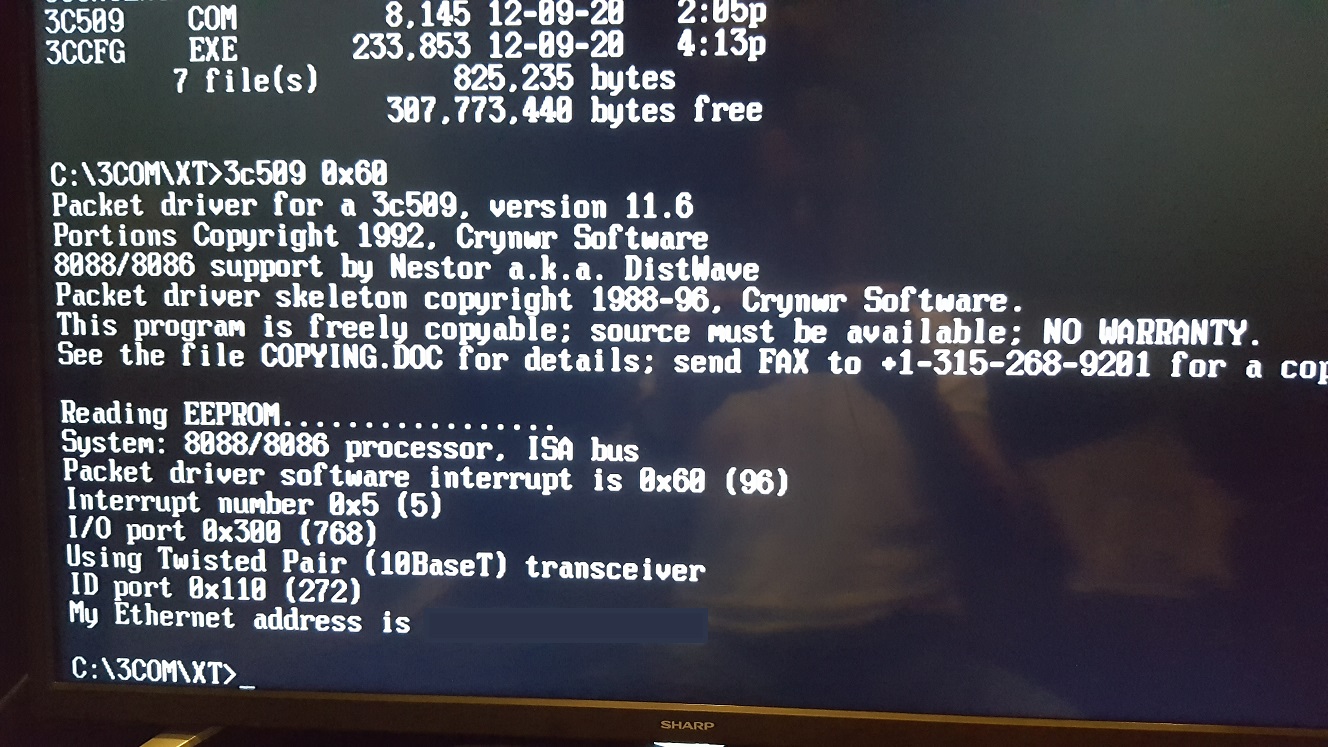
Note I've concealed my card's MAC address on that last line
Another issue I faced was that my XT is installed with an XT-CF-Lite CompactFlash card interface, whose I/O address is by default 0x300 - the same address that the packet driver uses - this means that after running the packet driver any attempts to access the CF card (my XT's 'hard disk') hung the PC due to the conflict. I learned that despite my XT-CF-Lite having DIP switches where you can set a different I/O address, the firmware also needs to match that setting, so I reflashed the XT-CF-Lite's firmware to use I/O address 0x320 instead, and then set the DIP switches accordingly to get it to no longer use 0x300. This was a much more long drawn-out process than simply being able to tell the packet driver to use a different I/O address, but there we go - I guess the 3C509 card is hard-wired (it certainly has no jumpers for configuration on it). Anyway, conflict averted.
Now the packet driver is running, it's time to get the machine assigned an IP address. To do this we run mTCP's DHCP utility. DHCP stands for Dynamic Host Configuration Protocol, and basically allows networking software to choose an available IP address for your machine automatically (as opposed to defining a fixed IP address that will never change). I had some issues getting the DHCP utility to work initially, where it would simply timeout after 3 attempts. It would also complain that there was a lot of whitespace on line 23 of the config file. To resolve this, I edited the .CFG file and ensured there was no whitespace after the # comment. I also made sure there was no comment (#) at the start of the following lines and edited them to match up with my directory structure where I had installed mTCP:
ftpsrv_password_file
ftp_srv_log_file
I also uncommented the FTP line at the bottom of the file called ftp_exclude_drives_AB. This tells the FTPSRV [tool which I will use in a bit] to ignore your floppy drives. If you keep this line commented out it takes ages to poll your drives when it starts - on my XT the difference was 65 seconds vs 6 seconds!
I also edited the ftppass.txt file, removing all spaces apart from one between the arguments on the first of the ftp lines, and deleting the subsequent lines plus the sample read-only line further down. Mine therefore looked like this:
anonymous admin [none] [any] all
Once I did this, I logged into the Admin side of my router and fixed the IP address to 192.168.1.100 if it saw my card's MAC address (since the configuration file is looking to hard-wire the IP address to 192.168.1.100 - this of course is editable but I know that address is currently available on my network). On my ASUS router's browser-based Administration firmware it can be found under LAN -> DHCP Server -> Manual Assignment, though it may be slightly different for your router.
Re-running DHCP now successfully assigns my XT with an IP address on the network:

Excellent! My XT is now on the network
File Transfers to and from the DOS Computer
Now to test the network connection by transferring some files from my Windows 10 PC to the XT. I used FileZilla on the Windows 10 side, and on the XT computer I ran mTCP's FTPSRV utility:
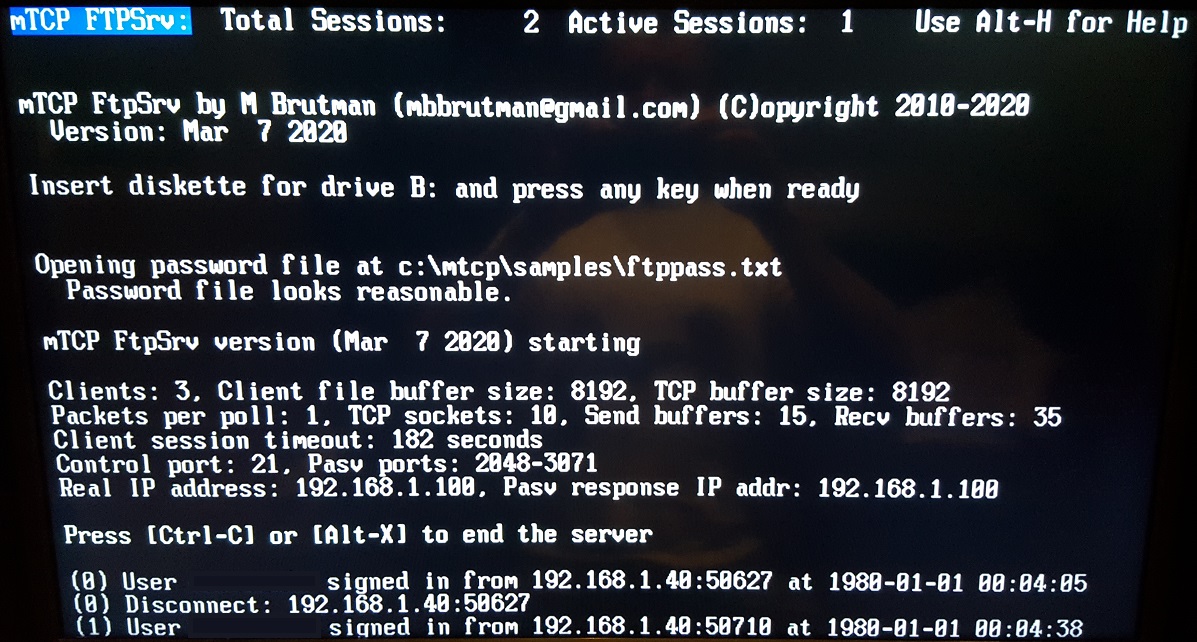
Starting up the FTP Server on the XT
mTCP's FTPSrv essentially sits in a constant state of polling for inbound packets until you exit the program.
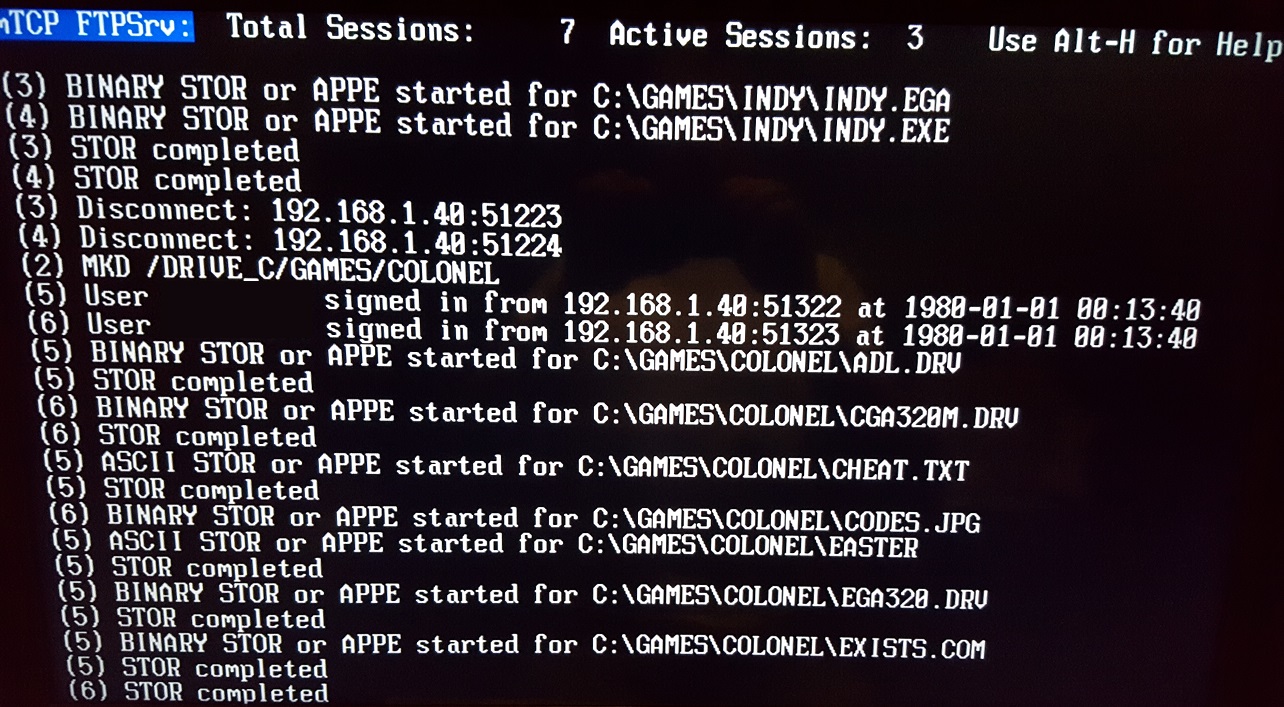
I transferred two games: Indiana Jones and the Temple of Doom, and The Colonel's Bequest: Laura Bow. All in, this was about 3.5 MB of data. The best transfer speed I noted was about 34 KB/second which is just slightly faster than reading from a 1.44 MB floppy disk and the worst was more like 10 KB/second, so pretty appalling, but hey, this is an XT.
I then ran some tests to transfer 1 MB of data, 55 files, but before doing so I tried changing some of the FTP settings such as Packets per poll. It improved peformance slightly as follows:
When set to 2: over 2 minutes to transfer 1 MB
When set to 4: 1 min 38 secs to transfer 1 MB
When set to 8: 1 min 38 secs to transfer 1 MB
I also tried increasing the TCP and File buffer sizes but the default of 16 (KB) is already the largest it will support.
To determine if it's the fact I'm running this network card in 8-bit mode or perhaps the fact that it's running in a slow XT, I will now move the card to my Pentium 200 MMX machine and run some transfers from there.....
The same 1 MB of data as I used before transferred in 35 seconds, meaning an average of 29.2 KB/sec. By contrast, a single large file of 9.3 MB transferred in slightly over 1 second.
I then tested the transfer of 47 MB over 6 files - the average transfer rate was a much better 1.33 MB/second.
FileZilla has a setting called "Maximum simultaneous transfers" which defaults to 2. Reducing this to 1 produced similar speeds to 2, while 3 or more on the XT machine had a detrimental effect - the server could not keep up with the demand ("421 Service not available, try back later").
Other Cards
To test PCI transfer speeds, I shifted to my Pentium 200 MMX retro PC. For the NIC, I used a 3COM EtherLink XL PCI, which is also a 10 Mbps card.
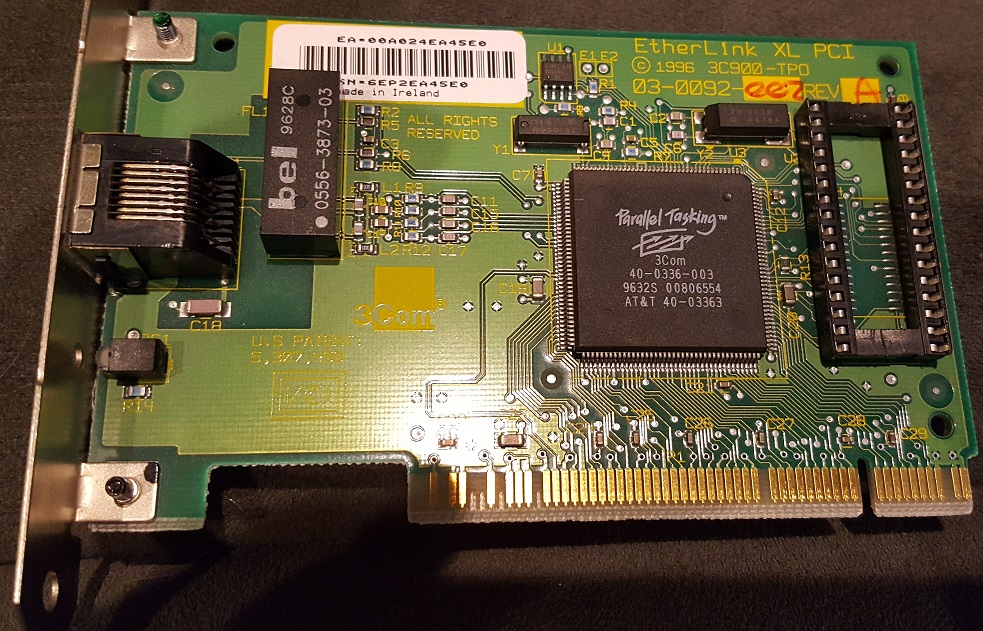
The 3Com EtherLink XL PCI (1996)
This card needs a different packet driver - one for the 3C90X family. It's under the PKTDVR folder and is called 3C90XPD.EXE. Once the packet driver is running I am updating my router's entry for the MAC address for 192.168.1.100, since of course this card has a different MAC address to the 3C509 ISA card I was using in the XT.
OK, the packet driver works just fine, but hangs the computer when I run DHCP, so I'm shifting over to use another 3Com PCI card:
The 3Com EtherLink 10/100 PCI 3C905C-TXM (1998)
This one is able to run at 100/Base-T, meaning maximum theoretical throughput climbs to 12.5 MB/second. It uses the same packet driver as the previous PCI card I was trying, and fortunately this one did work with DHCP to be assigned an IP address on the network.
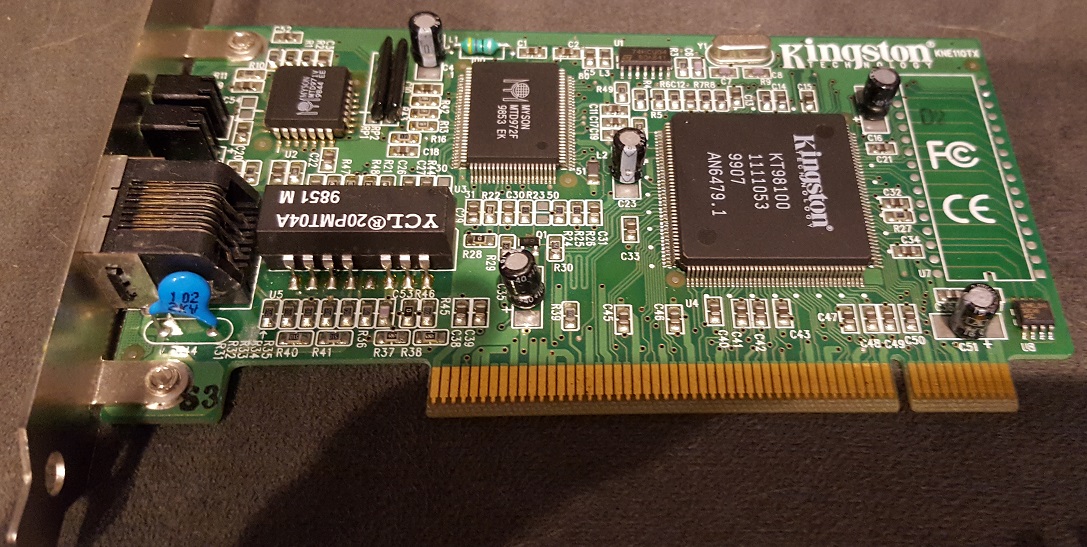
I also tested a Kingston EtheRx 10/100 (KNE-110TX) PCI card, and it produced the same results as the 3Com 3C905C card. The packet driver for this is in a self-extracting .EXE file, although I would recommend you simply run the QSTART.EXE DOS program to also allow it to run some diagnostic tests on the card before installing the driver of your choice.
The last card I tested was an Accton EN1207D-TX (packet driver here), which is also a 10/100 PCI card. It too produced similar transfer speeds to the Kingston and the 3Com 10/100 PCI card.
I then ran the same tests as before to get a comparison. Here are all my test results in one place:
| Total Data | # Files | ISA Card Speed on XT (KB/sec) | ISA Card Speed on P-200 (KB/sec) | PCI Card Speed on P-200 (KB/sec) |
|---|---|---|---|---|
| 1 MB | 55 | 10 | 29 | 27 |
| 3.5 MB | 30 | 34 | 138 | 157 |
| 10.4 MB | 100 | 24 | 131 | 146 |
| 18 MB | 1 | 44 | 735 | 2297 |
Bear in mind transfer rates are very dependent on file size, e.g. a transfer of 1 large file can take 1 second where that same file broken up into 50 smaller files will likely take minutes to complete.
Final Word
The upshot of this is that if you want to transfer large volumes of data, it is recommended to first compress it into a single .ZIP file, transfer that 1 file, and then unzip at the other end, especially when putting a slow computer on your network.
What are the alternative ways to transfer data to your retro PC? For most of us, we are running a CompactFlash card or SD card interface, and it's quite a simple process to remove the card, put it into your modern PC and copy files to it. I also use a Gotek floppy drive emulator, though this is only useful for floppy-sized files. Despite all of these other ways, the convenience of network transfers is too tempting to pass up. Say your CF card is not particularly accessible, and you want to transfer a lot of data, having a network card installed and a batch file ready to go to get the retro PC online can be handy.